About Muka
Muka Kete
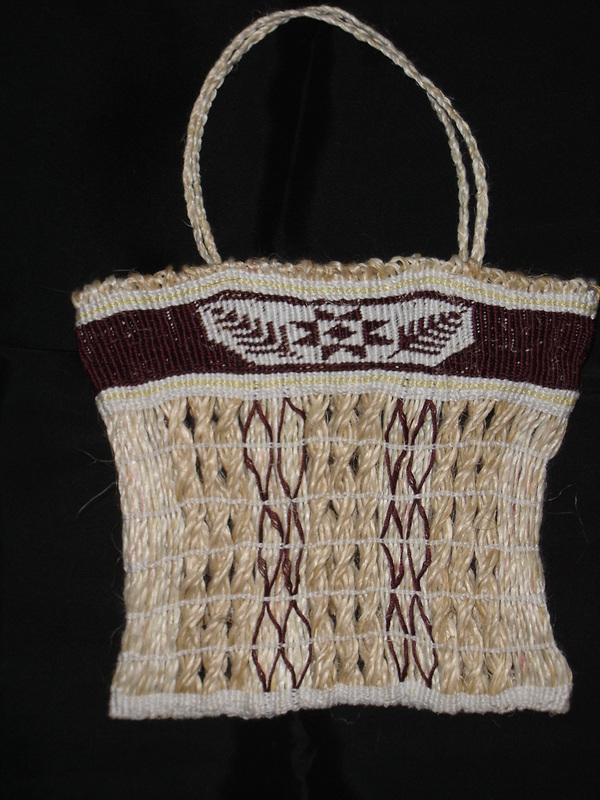
This kete was made using whatu work and taaniko (finger embroidery) method. It have used a mawhitiwhiti patternfor the main body part. The colours are: brown and white 4 ply cotton, natural and green tea dyed muka. I completed it for the Diploma in Maori Visual Arts in 2011.
It uses a contemporary pattern for the taaniko - a star and fern leaves.
Materials: muka and 4 ply cotton. Darker muka died using tea.
It uses a contemporary pattern for the taaniko - a star and fern leaves.
Materials: muka and 4 ply cotton. Darker muka died using tea.
Extracting muka from Harakeke (Haaro), the process
Muka is extracted from harakeke (NZ flax). It is quite a lengthy process.
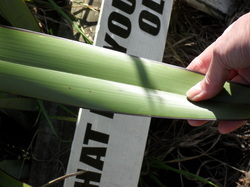
1. First you need to gather the harakeke, using the correct method and right plant (like the one on the photo, but there is more then one variety. This one has a thick black strip on the outside of the leaf)
2. Cut the harakeke into strips about 1.5 cm wide and put them into piles of 10 shiny side up.
3. Soak them for at least one hour to soften it.
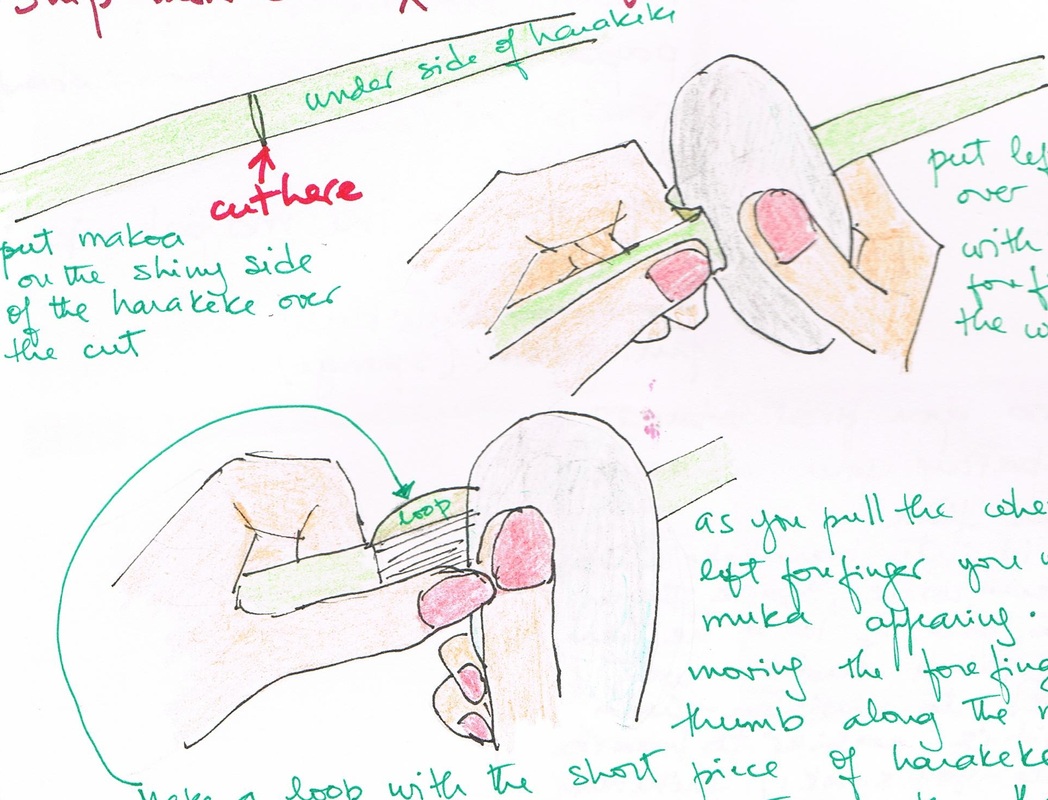
4 Then using a craft knife do a cut on the underside of the leaf and using a shell extract the muka. You may need to clean up the rest of the para from the muka. (There are various books that will give you detail on this process, check your local Library)
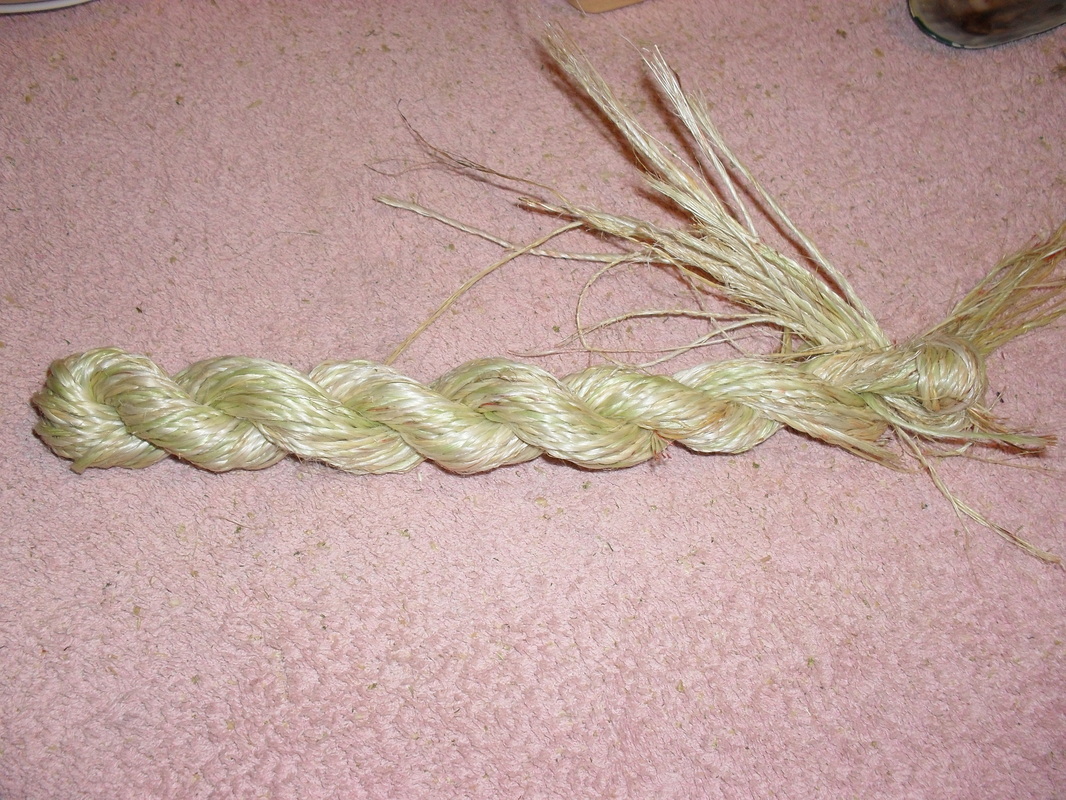
5. Then you need to miro the fibre, this is done by dividing the fibre you have just extracted into two and top and tail them, then you roll this muka in your leg, to twine it). Next soak your fibre overnight to get rid of the rest of the para (green) in warm soapy water (sunlight will do) and wash it the next day and dry.
6. Next step is to size the muka and skein it in bundles of 50.
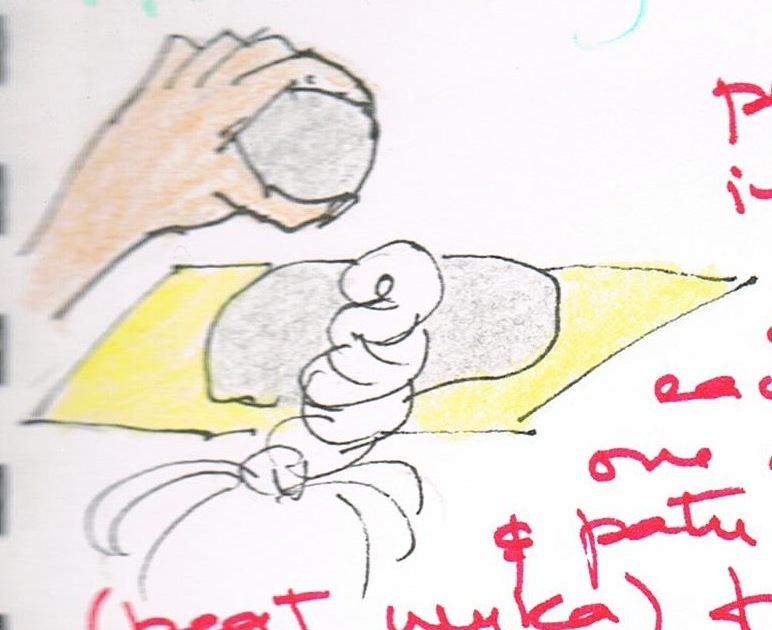
7. Wet the muka and with a patu or two round smooth stones you beat each bundle until the water is mostly out, keep turning it. Do this three or four times until muka is soft, then move to the next bundle of 50. Undo the skein and dry
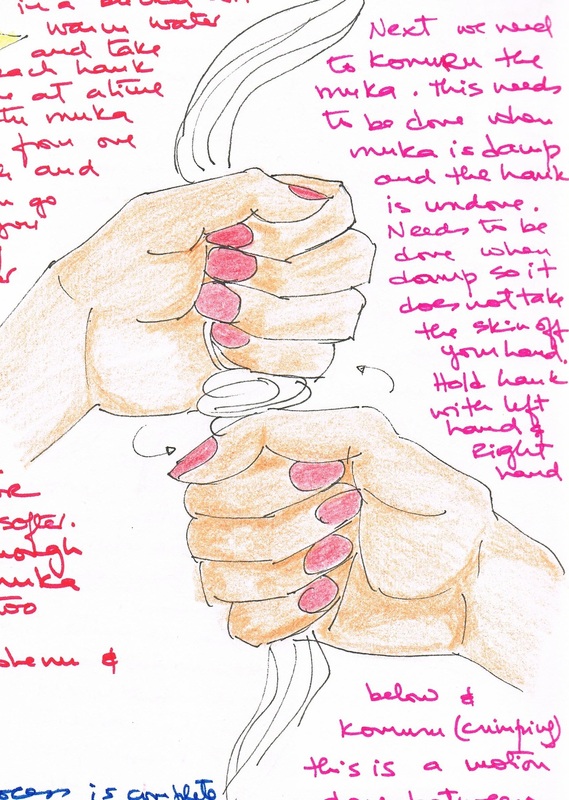
9. When almost dry (still damp), crimp the wool (konuru) by rolling the muka in your hands like a washing machine, from top to bottom.
10. Now dye it if needed or skein it again in bundles of 50, when dry to use later .
1. First you need to gather the harakeke, using the correct method and right plant (like the one on the photo, but there is more then one variety. This one has a thick black strip on the outside of the leaf)
2. Cut the harakeke into strips about 1.5 cm wide and put them into piles of 10 shiny side up.
3. Soak them for at least one hour to soften it.
4 Then using a craft knife do a cut on the underside of the leaf and using a shell extract the muka. You may need to clean up the rest of the para from the muka. (There are various books that will give you detail on this process, check your local Library)
5. Then you need to miro the fibre, this is done by dividing the fibre you have just extracted into two and top and tail them, then you roll this muka in your leg, to twine it). Next soak your fibre overnight to get rid of the rest of the para (green) in warm soapy water (sunlight will do) and wash it the next day and dry.
6. Next step is to size the muka and skein it in bundles of 50.
7. Wet the muka and with a patu or two round smooth stones you beat each bundle until the water is mostly out, keep turning it. Do this three or four times until muka is soft, then move to the next bundle of 50. Undo the skein and dry
9. When almost dry (still damp), crimp the wool (konuru) by rolling the muka in your hands like a washing machine, from top to bottom.
10. Now dye it if needed or skein it again in bundles of 50, when dry to use later .
|
|
|
|
All work shown in these pages are copyrighted to Isabel Fernandes-Day.
All rights reserved.
All rights reserved.
